Showing posts with label cupcake party. Show all posts

Wednesday, May 18, 2011

Cupcake Party: All in the Details

In an effort to wrap up the 'cupcake party' posts, here are a few of the details that I haven't mentioned yet.

  • I am a big fan of the FREE-to-download subway art found at eighteen25, this is a Birthday version
  • Small cupcake stands were made with plates and candlesticks found at the Dollar Store, then glued together and spray painted.  I have seen several tutorials for this.
  • Caraffe's seem to be popping up all over too!  I found these at Smart and Final as a set of two.  They are plastic and have a lid.   
  • I had grand plans of making this pennant banner, but my time started running a little short.  My wonderful friend Brooke swooped in and sewed several of them for me... and I am SO thankful!  She is much more detail-oriented that I am so I wouldn't have been able to pull them off as beautiful as she did!  BONUS: I can use them in the future or lend them out!! 
  • I kinda splurged a little on these paper straws from Sugar Diva.  I am a little bit obsessed with them.  We served pink (strawberry) milk, chocolate milk, and plain milk... so I felt the straws were such a cute addition!
  • And finally, I found this awesome idea in several places, but really liked the look of the Cupcake Garland tutorial found here, I was so sad to take it down after the party... it was just so pretty! 

So, there you have it!  Cupcake party fun!!

Tuesday, May 3, 2011

Cupcake Party: Cupcake Decorating Bar

As part of the on going saga that was my daughter's 6th birthday party, here is the next installment!
the Cupcake Decorating Bar

The idea was to have each child decorate two cupcakes... one they would take home and one they would have at the party.  I have to say, it worked pretty well... and I love the way it looked. 

Supplies/Ingredients:
  • Variety of Sprinkles... I had 6 different types found at a local cake decorating store
  • Chocolate and Vanilla frosting, portioned into individual sized cups
  • Vanilla frosting and food coloring, mix different colored frosting and add to smaller piping bags with fancy tips or decorating squeezers like the ones shown below (they are from Pampered Chef)
  • Cherries
  • Plastic spoons and Knives for spooning sprinkles and spreading frosting
  • To-go containers, preferably with a spot to put a name
  • Sticks or flags to add to the cupcakes to be eaten at the party
  • Premade cupcakes... I had 5 different types
The directions read:
Decorate 2 (cupcakes)...put 1 (cupcake) in a box to take home,
add a stick to the other one to eat at the party
The five types of cupcakes... they chose two
The birthday girl (on the right) decorating with a friend.
Completed cupcakes ready to be eaten at the party.
The to-go containers ready to go home with each of the party-goers!


Sunday, May 1, 2011

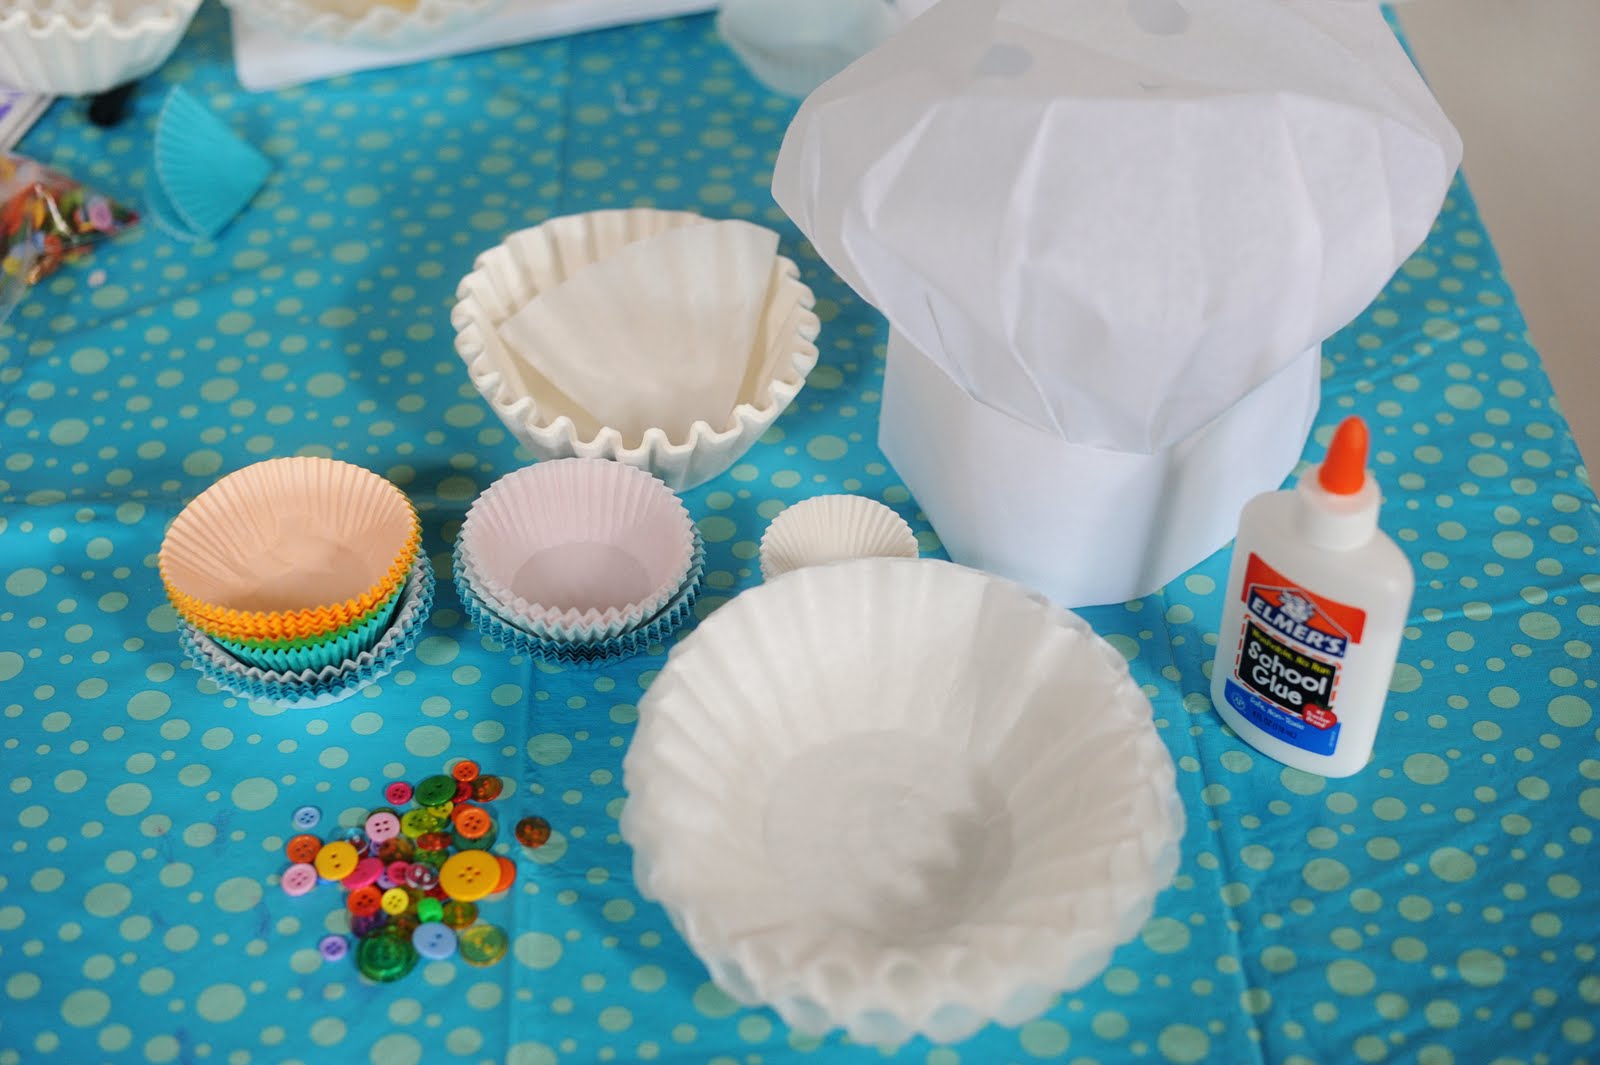
Cupcake Party: Chef's Hat with Coffee-Filter Flower


This is a craft the kids did at my daughter's recent cupcake birthday party!  The kids would be decorating cupcakes and making pizza, so a chef's hat fit right in with the cooking theme.

The Chef's Hats were found here.  I found them to be of decent quality, however they need to be stapled in the back once they are sized to the child's head.

I saw this idea for the coffee filter flower and modified it to fewer cupcake liners and coffee filters to make it easier for the kids.
Gather your supplies:
  • Chef's Hat
  • 6 coffee filters
  • 3 regular sized cupcake liners 
  • 1 mini cupcake liner
  • 1 Button
  • Plain old school glue

Directions:
  • Glue together two coffee filters, turning the second upside down on top of the first
  • Glue a third coffee filter correct side upon top of the others... this creates a more fluffy flower bottom.  Let this dry, if possible.
  • Fold the last three coffee filters in half and then half again, creating pie shaped pieces.
  • Glue the three coffee filters on the flower bottom 
  • Fold three cupcake liners in half and then half again, making pie shaped pieces.
  • Glue cupcake liners on top of coffee filters. 
  • Glue the mini cupcake liner on top of the others. 
  • Glue a button into the middle of the flower 
  • Glue the entire flower onto the front of the chef's hat. 
  • Embellish otherwise, we had the kids add their names to the front with name stickers (photos to come soon).
  • Size the hat to the child's head and staple the back... enjoy!

Tuesday, April 19, 2011

A Cupcake Birthday: Cupcake Aprons

A few posts back, I showed the cupcake clips that were the true inspiration behind the cupcake party.  Once those were made, the rest started to fall into place. 

I wanted to have a sprinkle bar for decorating cupcakes and then to have the kids make their own pizzas.  If this was going to be a cooking party, then the kids needed aprons.  I found these aprons that just so happened to have the best reviews and be the least expensive... score!   They would make a perfect party favor as well.  I opted to not have the kids decorate their own aprons, because I wanted them to use them right away, but they needed some decor in my opinion, so I went to work...

Supplies:
  • Fabric, pink and brown, cut into 6 x 8 inch pieces (this is the size that fits on the Silhouette mat)
  • Wonder Under (or the Silhouette brand fabric interfacing)
  • Silhouette, custom cutting machine (or a very good cutting hand!)
  • Sewing machine with pink and brown thread
  • Iron
  • Pink or Red buttons to use as a cherry


Directions:
  • Iron fabric interfacing onto fabric (follow directions on the package)
  • Use the Silhouette machine (or a pair of scissors) to cut the tops and bottoms of the cupcake shapes out of the interfacing [if using the Silhouette machine, there are a variety of different cupcake shapes available on the online store]
  • Peel off the back of the interfacing and iron the shapes into the desired spot on the aprons
  • Sew inside the shapes with a wide straight stitch.  I went a few times around each one on the top to give a little more 'shabby' effect.
  • Add a red button cherry to the top of the cupcake

Friday, April 8, 2011

iLoveToCreate: Cupcake Ribbon Sculpture clip

My olderst daughter just turned SIX!  I planned a little Cupcake-themed party for her and some of her friends and I decided to get a little crafty.

I bought a clip like this at a boutique and thought it was adorable, but they didn't have as many as I would need for her friends at the party. 

{cupcake hair clips attached to party aprons}

Here is where my 'I can make that' drive came in. 

I found my supplies...
  • Small pink polka-dotted 'Korker' ribbon {this just refers to how you coil the ribbon and set it}  More information on that here.
  • Green ribbon for wrapping...
  • Hair clips (I used the alligatior style)
  • White, brown, or other color ribbon for cupcake bottom
  • Hot Glue
  • Aleene's Stiffen Quik and STOP Fraying
  • Fabric Scissors

Cut 4, 5 inch strips of white ribbon at a time and lay them on a paper plate.  Spray with Aleene's Stiffen Quik and microwave 30 seconds to speed stiffening process. 

Fold the stiffened ribbon as shown, glueing down the center and trimming the edges. 
You could also trim off the point at the top, if desired.


Use the Aleene's STOP Fraying (or a candle/ lighter) to melt the edges of the ribbon and keep it from fraying.


Take a rope of your korker ribbon and hot glue one side into the corner of the cupcake bottom, as shown below.


 String the ribbon across to the left side.  Glue as you go making sure to not pull the ribbon too tight.


Follow diagram beolw, gluing the ribbon back to the right side and again across the top.


Be sure to leave enough ribbon at the end to tuck in the back.


Cover your alligator hair clips in ribbon.  Remember to STOP Fray the ends of the ribbon.


Hot glue the finished cupcake to the covered clip.  Be aware of which side you would like to clip it into your hair.  My daughters wear their clips on the right side, so I made sure the clips opened to the right.  

Spray whole cupcake now with Stiffen Quik to set the whole 'sculpture'.  My ribbons aren't going anywhere!

Aren't the just adorable?!?! 


Related Posts Plugin for WordPress, Blogger...